This is a pretty easy recipe that will give you a pizza pie that, in my opinion (and my kids), is better than what you can get from just about any pizza joint in town.
The key is quality ingredients and a cast iron pan.
I’ve included a sauce recipe as well as a recipe for tomato fillets, which I use instead of a sauce. The fillets are amazing and definitely worth a try.
Recipe
Timing: Start at 10am for the dough; bake the pizzas at 6pm. Each pizza (this recipe makes approximately three pies) takes about 9 minutes in the oven.
Equipment: 1 large bowl for the dough; large measuring cup for the warm water; a small bowl for the yeast mixture; a kitchen scale to measure ingredients; a large cast iron skillet.
Ingredients:
For the dough: 500g 00 flour; 350g warm water; 1g instant dried yeast; 10g fine sea salt.
For the sauce/fillets: 1 28oz can San Marzano tomatoes; glug olive oil; 1 or several cloves of garlic; tsp fine sea slat; 12 Thyme sprigs (dried sort of works).
Dough
This dough recipe is found in Ken Forkish’s amazing book, Flour Water Salt Yeast. If you’re into home baking this is one book you want on your shelf.
Step 1:
At 10am the day of your bake measure out 500g of flour, preferably 00 flour (you can find this in most grocery stores now), and place in a large bowl.
Measure 350g of warm water.
Measure 1g of instant dried yeast.
Add 1.5 tbs of the warm water to the dried yeast. Swirl it around to mix it a bit and set aside.
Mix the rest of the warm water with the flour until it is generally combined.
Cover (I use a large, clear plastic bag, which I save and reuse) and let rest for 30 minutes.
Step 2:
Sprinkle 10g of fine sea salt on top of the dough.
Pour the yeast mixture on top of the dough. Tear off a small piece of dough and use that to wipe out more of the yeast mixture.
Mix the dough by reaching under, grabbing the dough, and then pulling it gently up and over the top of the dough. (You don’t want the dough to tear when you do this.) Give the bowl a quarter turn and repeat. Repeat this several times.
Then, using your thumb and index finger, pinch off segments of dough, working your way through the entire portion.
Repeat this until the dough is well mixed.
Cover again and let rest for one hour.
Step 3:
After an hour give your dough one more fold all around, so reaching under and pulling it gently up and over itself, turning and repeating on all four sides.
Drizzle olive oil around the sides of the bowl and turn the dough in it so that it is coated.
Cover and let it do its thing until 5pm or so.
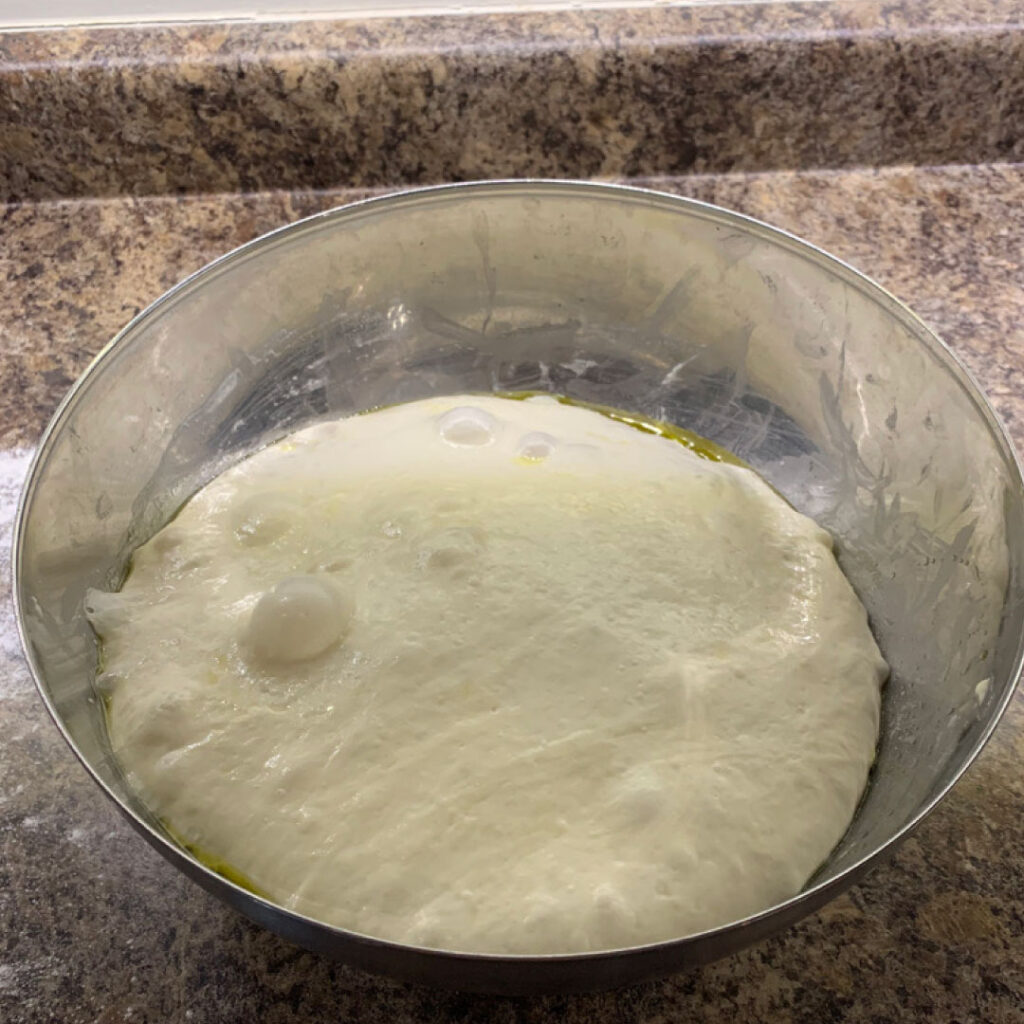
Step 5:
At 5pm your dough is ready to turn out. It should look something like this:
Turn the dough out onto a floured surface and use a knife or dough scraper to divide into three equal parts.
Create rounded dough balls from each part by cupping the dough with both hands, fingers toward the back with pinky resting on the counter surface, and then gently drawing the dough towards you. The dough on the front bottom should be pulled under. Turn the dough and repeat several times until you have a nice surface tension over the ball of dough.
Place these dough balls on a lightly floured baking sheet. Dust the tops with flour and then cover with your plastic bag.
Put the dough in the fridge for at least half an hour.
Step 6:
Prepare the sauce or tomato fillets.
This step is the same for both the sauce and the fillets (if you’re doing the fillets pre-heat your oven to 325ºF):
Drain one can of San Marzano tomatoes in a sieve or colander for ten minutes. (Yes, the type of tomato you use is really important. San Marzano is sweet and tangy and your pizza and pasta just won’t taste the same without them.)
Sauce:
Combine the drained tomatoes, a clove of garlic, a good pinch of sea salt, a similarly good pinch of red pepper flakes, and glug of olive oil in a blender.
Blend.
Pre-heat oven to 500ºF and place your cast iron pan in the oven so that it’s nice and hot when you’re ready to add your pizza.
Tomato Fillets:
Tear the drained tomatoes into pieces and places on a plate. Allow juices to run out for a minute or two.
Arrange the torn tomato fillets on a baking sheet.
Place thyme sprigs on top.
If you want to include roasted garlic on your pizza now is the time to add them. Lightly crush cloves of garlic, but leave the skin on. Toss onto the baking sheet with the tomatoes.
Drizzle all with olive oil.
Sprinkle sea salt on.
Place in oven for about 30 minutes.
When your tomato fillets are done increase the heat of your oven to 500ºF and place your cast iron pan in the oven so that it’s nice and hot when you’re ready to add your pizza.
Let your roasted garlic (if you’ve done that) cool and then squeeze the garlic out from the skins.
Step 7:
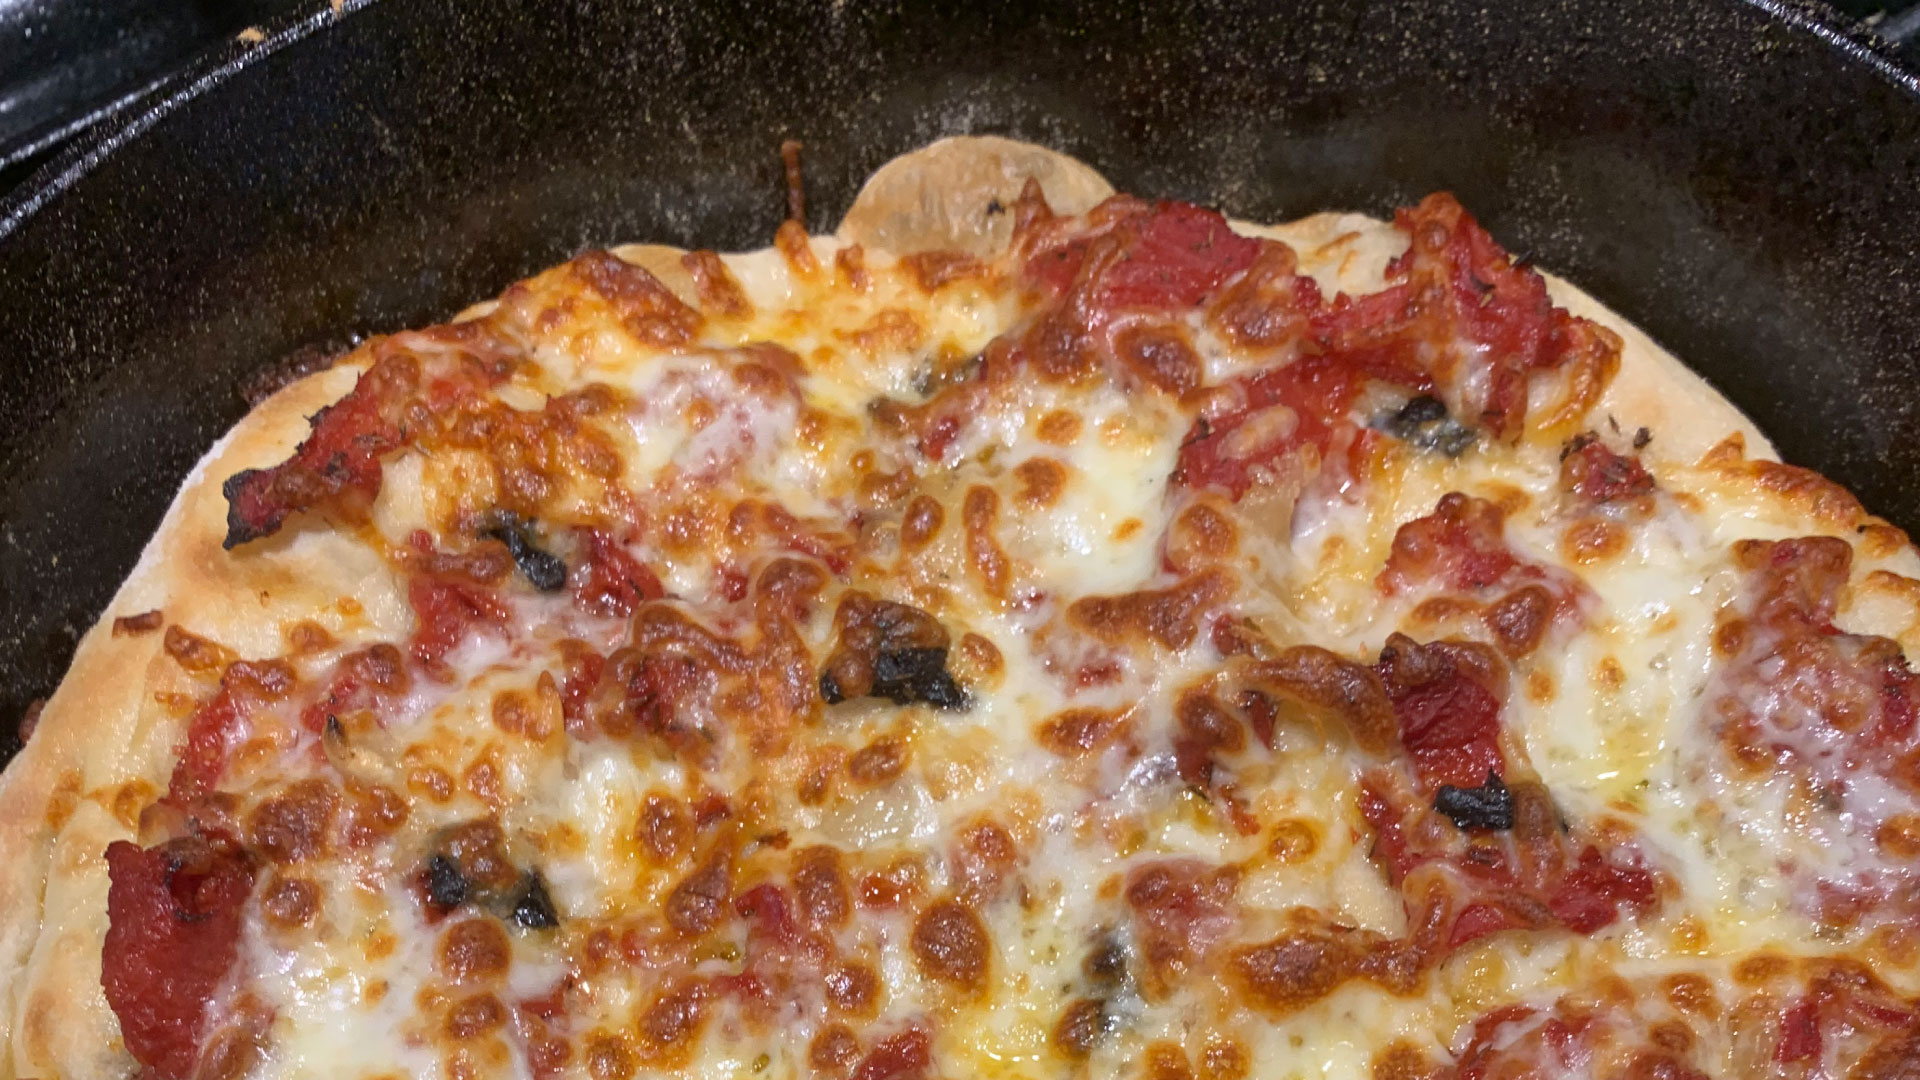
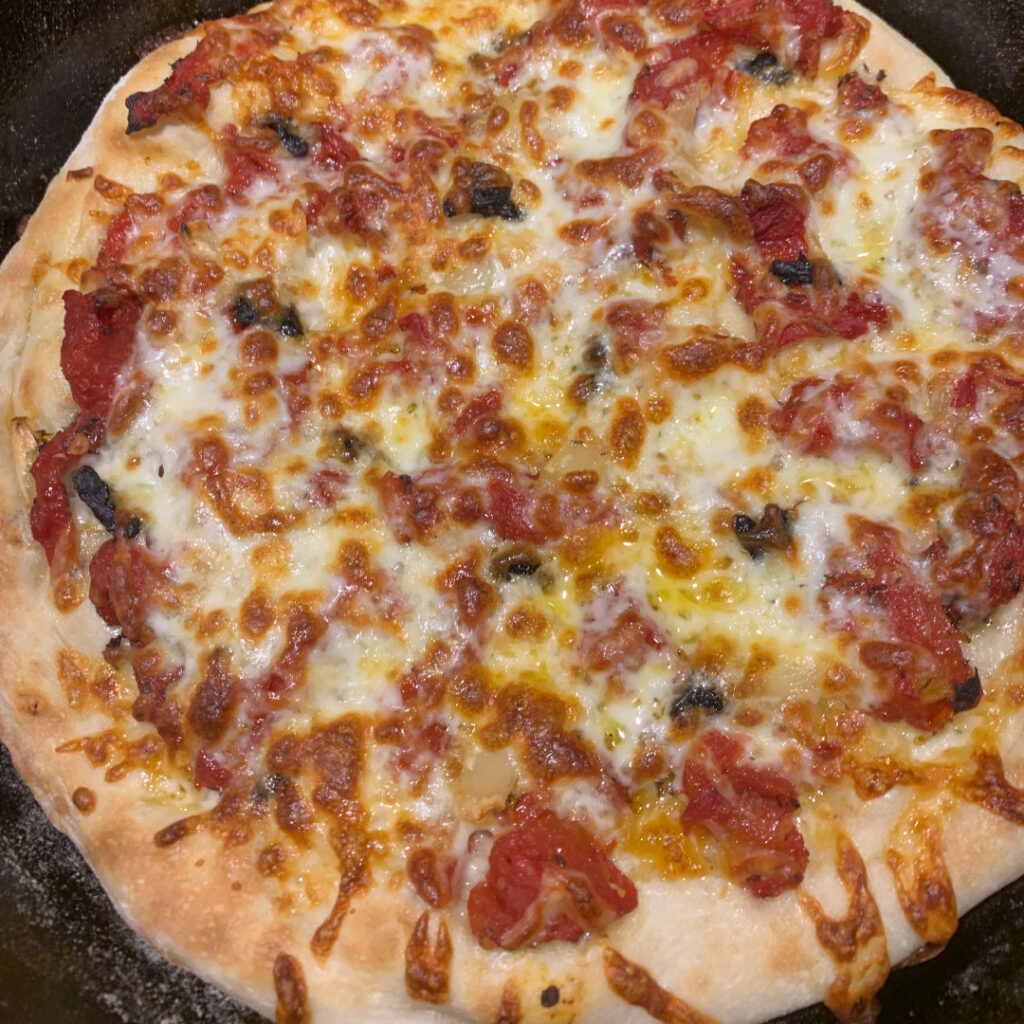
Prepare your toppings. (The pizza pictured above was simple, with the tomato fillets, roasted garlic, black garlic, red pepper flakes, Parmesan and basil (not pictured) after the pie came out of the oven, and olive oil drizzled on top.)
Step 8:
Take your dough out of the fridge.
Place one dough ball on a floured surface.
Flip the dough over so that both sides are floured.
Using your fingers and spreading them apart gently, work the dough into a disc. If you’re comfortable tossing the dough go ahead. I prefer to just work it out on the counter and find that I get a more even consistency in the crust.
Step 8:
When your dough is ready, and being very careful, take the hot cast iron pan out of the oven.
Place the dough in the cast iron pan and dress your pie.
Don’t worry too much about the timing here. I’ve found that the crust benefits from being in the hot pan a bit, so don’t rush (but don’t slack off either).
Once you’ve dressed your pizza put it in the 500ºF oven. (I use the middle rack.)
Cook for 7 minutes, then turn on your broiler and cook for 1 – 2 minutes.
Remove from oven.
I like a bit of a charred bottom on my pies, so after I’ve done the three pizzas I place each one in the pan again, but this time on the stove top with the heat set to full.
Check frequently and remove when you have it where you like it.
Step 9:
Enjoy!